Invoices
Invoices allow you to build invoices and either send them out for payment or, to complete them yourself as an administrator to attach payment plans or receipts to a user account. Practically, invoices are like a shopping cart for administrators which they can use on behalf of a user in the system.
To get started, you just need to select “Invoices” from the Presspoint menu or, select “Invoices” from the Actions menu on a user profile. If you are starting from the general Invoices page, you can click “New Invoice”.
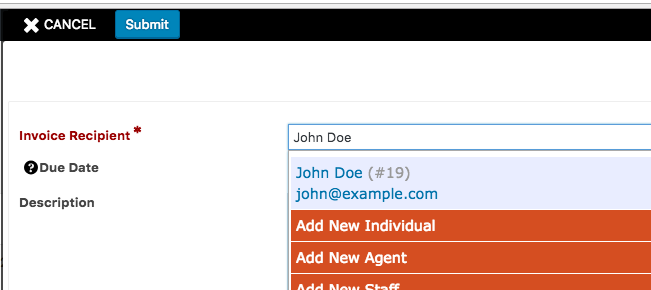
When the panel slides out, type the name of the Individual or Organization and select them, clicking “submit” above to generate the invoice template.
When the invoice loads, there are a several fields of interest:
- Invoice: Shows the invoice number and is linked to the payable invoice that you can directly share.
- Contact: Who the invoice will be attributed to once paid and links to their profile.
- Administrator: Who created the invoice.
- Description: Any additional details you wish to include for administrators.
- Due Date: When the invoice is due.
- Income Date: When income should be booked for the payment (defaults to date the invoice is paid).
- Deposit Date: When the funds will be deposited (defaults to date the invoice is paid).
- Check Date: If paying by check, what date is written on the check.
- Check Number: If paying by check, the sequential number of the check.
- Process As: How the receipt items should be processed. The default is completed but if you are generating an item to be held for further payment, yo can adjust this to be any of the payment status flags in the system.
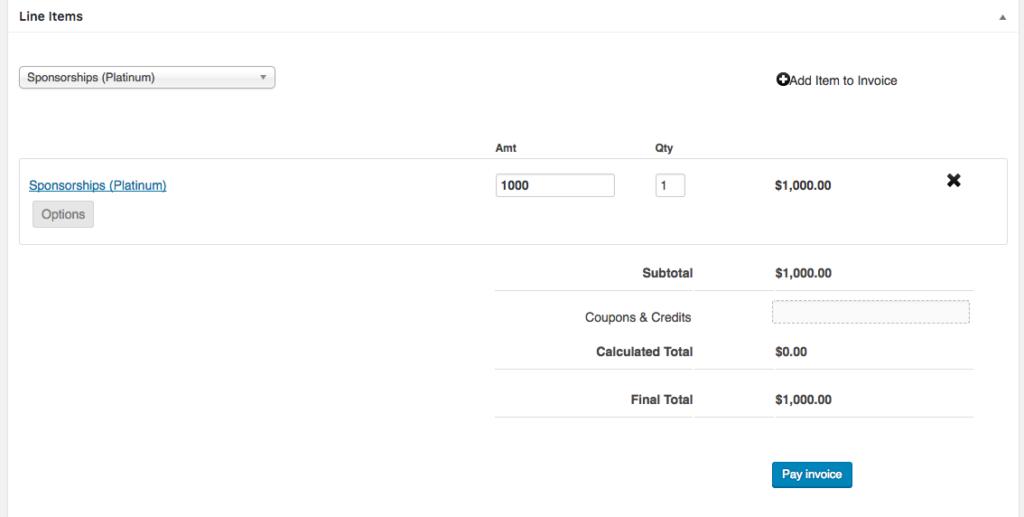
Lastly, under Line Items you can use the drop down to select the items you wish to add to the invoice and add them by clicking the “plus” button beside “Add Item to Invoice.”

Once an item is added they appear just as if they were added to the cart on the front end of the site. Here you can add coupon codes and adjust for tax and shipping as needed. Should you need to override the amount of the item, you can easily do so.
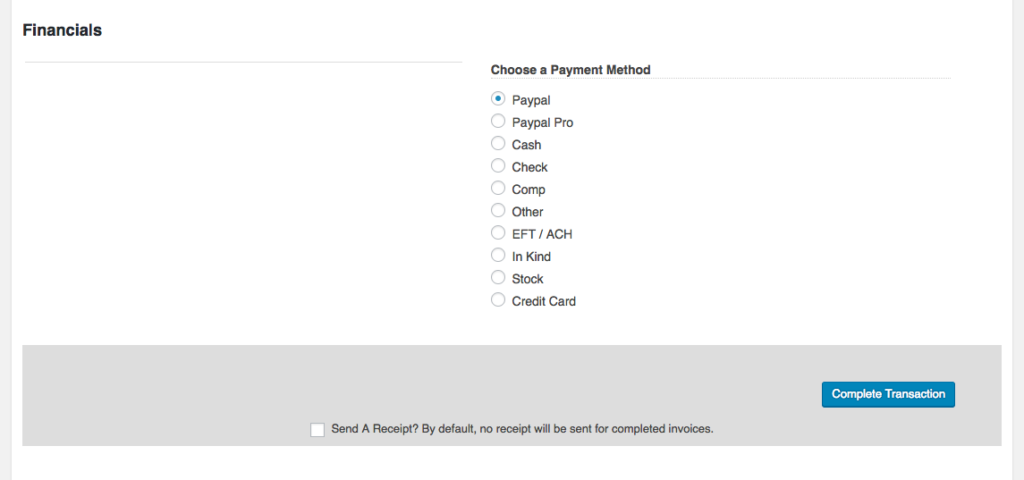
Finally, when you are ready, you can choose to email the invoice to the user or you may click “Pay Invoice” if you wish to finalize the invoice right away. Paying the invoice brings up the checkout screen with the user’s information in place for billing purposes but you have the full range of payment methods available to process the payment. Additionally, you can choose to send a receipt to the user or allow the items to process to their account silently.
Once the transaction is completed, the line items are processed normally and appear as individual receipt items on the user’s history.