Importing Data
Importing Data into Presspoint is a fairly direct process. You can import user data via a CSV (Comma Separated Value) file that is a standard data interchange document – all spreadsheet applications can easily read and write data in this format.
Preparing to Import
Before you import your data, you must have a corresponding field in Presspoint for each field in your CSV. You cannot create fields from the Import UI, you have to do it in advance so, make sure that your profiles contain all the fields you need.
When importing Actions (eg. Receipt Items, Notes, etc.) these fields already exist and you will likely find a match.
That said, you do not need to specially format your CSV file since you will be matching columns to fields during the import process.
* Creating Individuals vs. Organizations
If you wish to create an individual user then you do not need to do anything special. For Organizations, however, be sure to include a column in your import for this designation and, for each organization you are importing, be sure to include the value of ‘org’ (ensure the value is all lower case) and match this column to the field “User Type.”
** Importing Taxonomies (Checkboxes)
When importing multiple value for a taxonomy you do need to ensure your data is prepared for Presspoint. For example, if you have a field called “favorite colors” and it is has checkboxes for Red, White, Blue, Green, Dark Blue, Dark Green and Deep Purple you simply need to ensure that the column for each user has the appropriate values separated by | (“pipes”) ; (semicolons) or , (commas). If you are separating by commas, make sure that your fields in your file are properly encased with double quotes. Therefore, if you are importing John Doe who likes Red, Green and Deep Purple, make sure that his values look like this “Red,Green,Deep Purple”.
Importing: Getting Started
Navigate to the Reports tool and choose under “Operations” the option to Import. It should look like the item below:
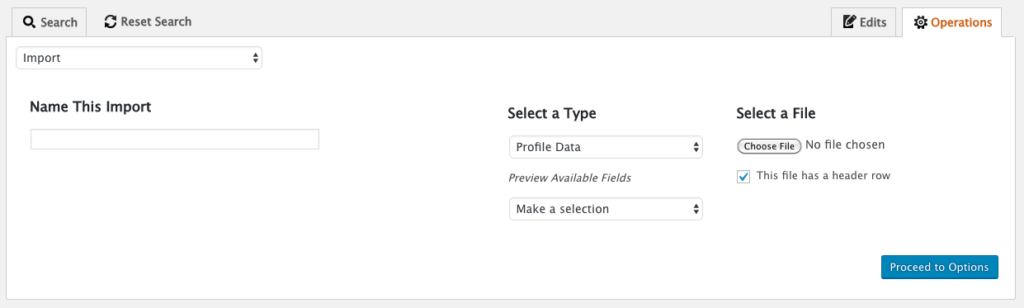
Name This Import
You can name this import to better keep track of it.
Select a Type
The default is “Profile Data” but you can choose an Action from the list to import (eg. Receipts, Notes, etc.) and preview the available default fields in the dropdown below. When importing an Action you will always have the opportunity to import Profile Data.
Select a File
Upload a file from your computer and if it has a header row, be sure to let Presspoint know that.
Importing: Options
Once you click “Proceed to Options” your file will begin uploading and Presspoint will render the next screen as well as a visual table of the first five (5) rows of your CSV:
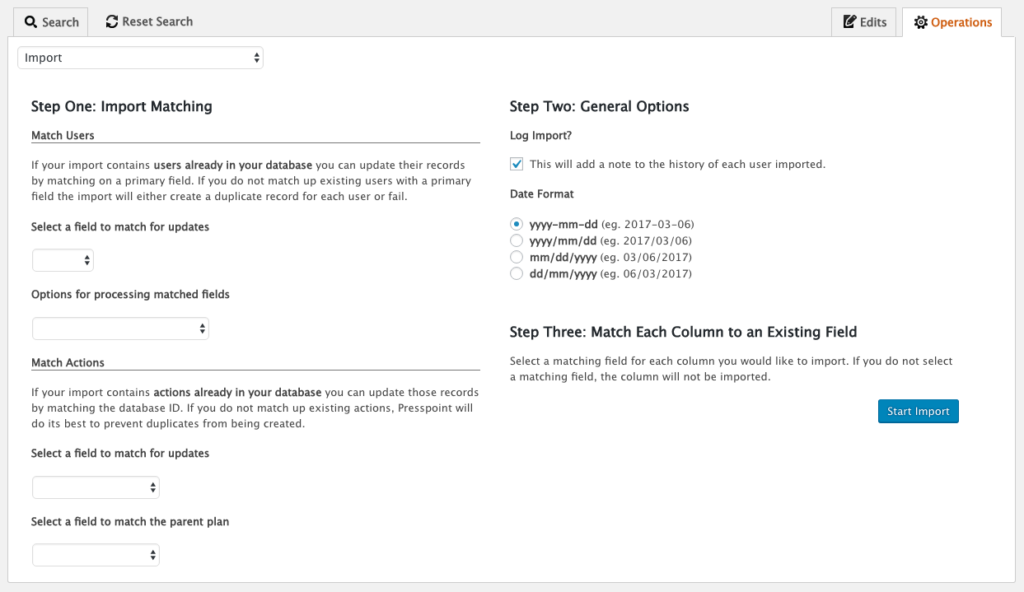
Step One: Import Matching
You can match users to existing users in the database to update users. Additionally, you can match existing actions to update existing records in the database. In the case of payment plans, you can additionally match new child payments to a parent plan.
Step Two: General Options
You can optionally choose to add a log entry to each profile that is imported as a reference to the event. More importantly, if your date format differs from the ISO standard of YYYY-MM-DD you need to declare that here so that Presspoint knows how to read the date. If your date format is not shown, you should reformat it before importing and ensure that the format was saved properly by inspecting the values you see in the preview of your file. This is very important – reviewing your date format.
Step Three: Matching of Columns
The first five (5) rows of you CSV will be presented like in the example below. You must match each column you wish to import with a field in Presspoint in order for it to be imported correctly.

Importing: Go!
Once you start the import, Presspoint will handle the rest. You must leave the window on the import process and Presspoint will display its progress as well as try and predict how long the import will take. When it is done, you will be able to download a copy of your original CSV with an additional column detailing the successes and failures (if any).